The best stains for wood decks depend on factors such as the type of wood, desired appearance, level of protection needed, and environmental conditions. Here are some common types of stains and their characteristics:
Transparent Stains:
Transparent stains allow the natural grain and texture of the wood to show through while providing a subtle color enhancement and UV protection.
These stains are ideal for new or high-quality wood decks where the natural beauty of the wood is a priority.
Transparent stains may require more frequent reapplication than other types of stains, as they offer minimal protection against weathering and UV damage.
Semi-Transparent Stains:
Semi-transparent stains offer a balance between color enhancement and wood grain visibility, providing moderate coverage and UV protection.
These stains are suitable for moderately weathered wood decks that need both color enhancement and protection against sun damage and moisture.
Semi-transparent stains may require periodic maintenance and reapplication to maintain their appearance and protective qualities.
Semi-Solid Stains:
Semi-solid stains provide greater color coverage and opacity than transparent or semi-transparent stains, while still allowing some wood grain to show through.
These stains are suitable for weathered or imperfect wood decks that need moderate to heavy coverage and color enhancement.
Semi-solid stains offer better UV protection and durability than transparent or semi-transparent stains and may require less frequent reapplication.
Solid Stains:
Solid stains offer maximum color coverage and opacity, effectively hiding imperfections and providing a uniform appearance.
These stains are ideal for heavily weathered or damaged wood decks that need extensive coverage and protection.
Solid stains offer the highest level of UV protection and durability, making them suitable for harsh environmental conditions and high-traffic areas.
Solid stains typically require less frequent reapplication than transparent or semi-transparent stains due to their thicker film-forming properties.
When choosing a stain for your wood deck, consider factors such as the level of exposure to sunlight, moisture, and foot traffic, as well as your aesthetic preferences and maintenance capabilities. It’s also important to properly prepare the wood surface and follow the manufacturer’s instructions for application and maintenance to ensure optimal results and long-term durability.
Yes, wood rot can spread if the conditions that promote fungal growth and decay are present. Wood rot is caused by certain types of fungi that thrive in moist, damp environments and feed on the cellulose and lignin in wood. When wood is exposed to prolonged moisture and lacks adequate ventilation, it becomes susceptible to fungal colonization and decay.
Wood rot can spread in several ways:
Direct Contact: Fungi can spread from infected wood to adjacent healthy wood through direct contact. This can occur when fungal spores or mycelium (the vegetative part of the fungus) come into contact with untreated wood surfaces.
Moisture Transfer: Moisture is a critical factor in the growth and spread of wood rot fungi. If water is allowed to penetrate into the wood or accumulate on its surface, it creates ideal conditions for fungal growth. Water can also carry fungal spores from one area to another, facilitating the spread of rot.
Capillary Action: Wood fibers have a natural tendency to absorb moisture through capillary action, which can transport water and fungal spores deep into the interior of the wood. Once inside, the fungi can colonize and spread throughout the wood, leading to widespread decay.
Adjacent Materials: Fungal spores can also spread to nearby materials, such as drywall, insulation, or other organic matter, if they come into contact with infected wood. This can occur if wood rot is not properly contained and remediated, allowing the fungi to proliferate and spread to surrounding materials.
Structural Components: In structural applications, wood rot can compromise the integrity of load-bearing components such as joists, beams, and studs. If left untreated, rot can weaken these structural elements and pose safety hazards to buildings and occupants.
To prevent the spread of wood rot, it’s essential to address underlying moisture issues and provide adequate ventilation to keep wood surfaces dry. This may involve repairing leaks, improving drainage, sealing cracks and gaps, and ensuring proper airflow around wooden structures. Additionally, treating wood with fungicidal preservatives can help protect against fungal decay and inhibit the spread of rot. Regular inspection and maintenance of wood structures are also important to detect and address signs of rot before it spreads and causes extensive damage.
Mold on your deck is not necessarily dangerous in the sense of being immediately harmful to your health, but it can pose certain risks and should be addressed to prevent potential issues. Here are some considerations regarding mold on your deck:
Allergens: Mold spores can be allergenic for some individuals, causing allergic reactions such as sneezing, coughing, itching, and respiratory symptoms. People with allergies or asthma may be more sensitive to mold exposure.
Slippery Surface: Mold growth on your deck can create a slippery surface, especially when wet. This increases the risk of slips, trips, and falls, which can result in injuries, particularly if the deck is used frequently or by children and elderly individuals.
Surface Damage: Over time, mold can cause surface damage to wood decks, especially if left untreated. Mold may penetrate the wood fibers, leading to staining, discoloration, and deterioration of the wood. This can weaken the structural integrity of the deck and require costly repairs or replacement.
Aesthetic Concerns: Mold growth on your deck can detract from its appearance and curb appeal. Stains, discoloration, and black or green patches of mold can make your deck look unsightly and unkempt.
Potential Health Risks: While most types of mold found on outdoor surfaces are not toxic, certain species of mold can produce mycotoxins that may pose health risks if inhaled or ingested. However, the risk of exposure to toxic mold is generally low in outdoor environments.
To address mold on your deck and mitigate potential risks, consider the following steps:
Regularly clean and maintain your deck to remove dirt, debris, and organic matter that can promote mold growth. Sweep or power wash your deck periodically to remove mold spores and surface buildup.
Use a mold-inhibiting cleaner or mildewcide solution to treat areas of mold growth on your deck. Follow the manufacturer’s instructions for proper application and safety precautions.
Improve ventilation and airflow around your deck to reduce moisture accumulation, which can contribute to mold growth. Trim back vegetation, clear debris from drainage channels, and ensure proper water drainage away from the deck.
Consider applying a mold-resistant sealant or wood finish to your deck to help prevent mold growth and protect the wood from moisture and UV damage.
Address any underlying issues that may be contributing to mold growth, such as leaks, drainage problems, or excessive shade and moisture retention.
By taking proactive measures to address mold on your deck and prevent its recurrence, you can maintain a safe, attractive outdoor space for your enjoyment.
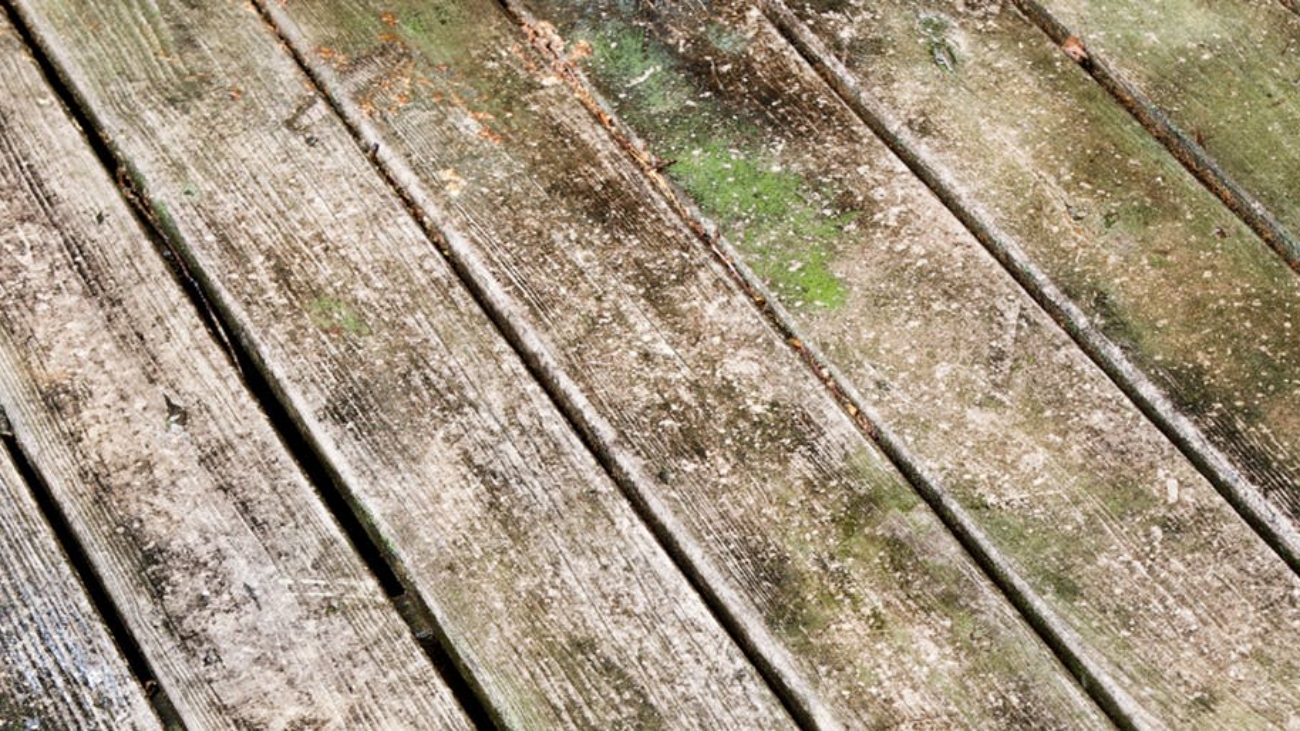
There’s no secret to deck maintenance – repair the deck, clean it and protect it. But learning tricks the pros use can make the job go faster and the results last longer. Here is how you go from old deck to new deck in 4 steps…
The damage was bad. The appearance was worse. The Johnsons to consider ripping up the entire deck and starting over.
Barbara and Phil Johnson, of Mobile, Alabama, faced the same problems that many other deck owners face. Over the years, the elements, kids and pets took a devastating toll on their backyard deck. The damage was bad. The appearance was worse. The Johnsons to consider ripping up the entire deck and starting over.
Before taking such a drastic step, they spoke with a construction company for advice. According to the contractor, the Johnsons’ deck was in better shape than most. “This area of the country is tough on decks,” he says. “I’m sometimes asked to replace pressure-treated decks that are less than eight years old.” He adds, “Most of these decks are victims of neglect. With regular maintenance, a deck will easily last for twice as long.” The good news is that most decks, like this one, can be rejuvenated for a lot less than the cost of replacement.
Following are some techniques you can use to give an old deck a new lease on life, or to help maintain the look of a new one. For this project, we enlisted George Graf, a lead carpenter with Mobile’s Lipford Construction, and John Starling, owner of John the Painter. Hiring pros is easy on the schedule but hard on the budget—the cost of repairing a 700-sq.-ft. deck is $700, or about $1 per square foot. Restoring a deck yourself will cost a third as much.
A deck rejuvenation project like this can be done in two days, but it’s best to spread the work over two weekends to ensure the wood is completely dry before you apply stain.
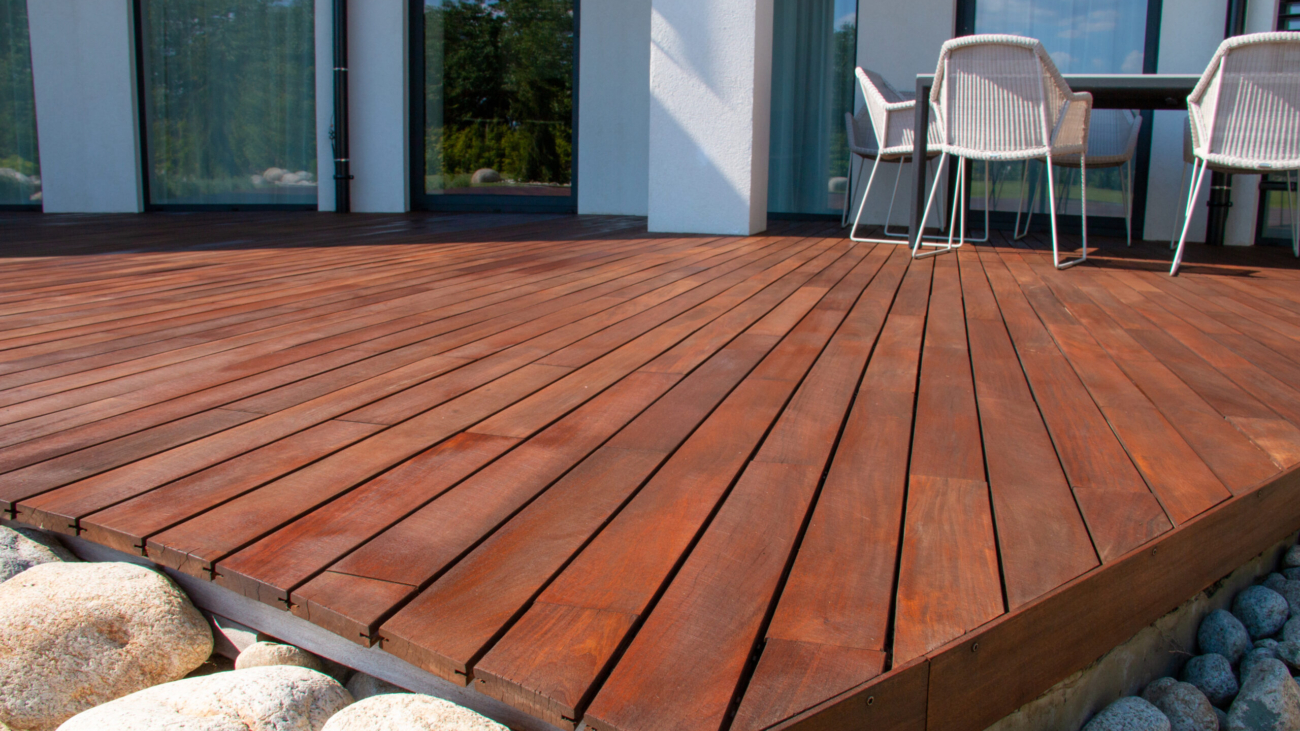
AFTER: Most decks can be rejuvenated for a lot less than the cost of replacement.
Step 1: Making Repairs
Begin by inspecting the entire deck. Pay special attention to any part of the deck that is in direct contact with the ground, such as the posts, stair stringers or joists that are at ground level. Graf uses a screwdriver to check for structural damage. “If you can sink the tip of a screwdriver into a post or joist, it means the you’ve got rot and it’s time for a major renovation,” Graf says.
Also, inspect the deck-to-house connection. “Screws and bolts can loosen and rust,” he says. “Without the proper use of spacers and flashing, moisture can cause your band joist to rot.”
Tighten the fasteners that attach the deck to the house, look for any missing, bent or rusted flashing and carefully inspect inside and out for any telltale black stains that suggest moisture is working its way into your home.
Next, look for any cosmetic damage. For example, tap down any popped nails or consider replacing them with screws. For the Johnsons’ deck, Graf used galvanized ring-shanked nails when he replaced a few damaged boards. “Screws don’t pop like nails, ” he says “but we want the new boards to match the rest of the deck.”
Tip: If you need to rip replacement decking to match existing boards, use a tablesaw. Ease the sawn edge using a router fitted with a ⅜-inch roundover bit.
Carefully inspect railings and decking for loose wood. “No one likes to catch a 2-in.-long splinter on the hand or foot,” Graf says.
Use a pry bar to pull damaged boards. Remove fasteners and lift the board straight up to avoid damaging adjacent boards.
Step 2: Cleaning the Surface
Here’s the bad news: Every deck should have an annual cleaning. Assuming they have been maintained regularly, most decks can be revived with just a deck cleaner. Some products, like Thompson’s Deck Wash ($10, 1 gal. covers 250 sq. ft.), you mix in a bucket and apply to the deck; others, like GE’s Weathermate ($30, 1 gal. covers 500 sq. ft.), come in containers with integral applicators that you hook up to a garden hose. Once on the deck, most still require a stiff-bristle brush and a lot of elbow grease to work the mixture into the wood.
Always wear eye protection and gloves when working with concentrated chemicals. You’ll also want to protect nearby plants. The level of plant protection depends on the type and concentration of the chemicals you choose. For weak solutions and “plant-friendly” cleaners, you may need to only mist the plants before and after using cleaning. Powerful deck restorers can burn leaves on contact; in that case you should cover nearby plants with plastic sheeting.
For tackling tough stains, use a pressure washer (about $70 a day), which is the best way to remove sun-damaged wood fibers and tackle scrub-resistant stains. Graf recommends using a fan-type nozzle instead of a pinpoint nozzle that can dig into the wood. For removing the mildew, Graf mixes his own cleaning solution (see “Choosing the Right Cleaner,” on the facing page), which he feeds into the intake hose on the washer.
Go over the deck with a stiff-bristle brush to work the cleaner into the wood fibers, and then rinse. The boards should be kept damp in order for the cleaning solution to work effectively. Allow the deck to dry thoroughly before staining.
Choosing the Right Cleaner
There are dozens of deck-cleaning products on the market. Most contain one of the following four chemicals as their main ingredient. Each is effective for different types of stains.
Sodium hypochlorite: This chemical—chlorine bleach—is good for removing mildew but isn’t effective on dirt or other stains. So mix it with an ammonia-free detergent. Thoroughly rinse the deck after using this chemical because it can eat away at the wood, resulting in fuzzing and premature graying.
Sodium percarbonate: When mixed with water, this chemical forms hydrogen peroxide (an oxygen-based bleach) and sodium carbonate, which acts as a detergent. It is good for removing dirt, mildew and weathered wood.
Oxalic acid: This is effective in removing iron stains and the brown-black tannins that frequently occur with cedar and redwood decks. This acid is commonly found in deck brighteners. Oxalic acid isn’t effective against mildew, so you may want to use it after cleaning the deck with a bleach-based cleaner.
Sodium hydroxide: Also known as lye, this is the key ingredient in most finish lifters or removers. Don’t leave it on too long, or it can eat away at the wood.
Be very careful when working with any of these chemicals, especially when they’re in their most concentrated (premixed) form. Wear the proper safety equipment and follow the manufacturer’s directions to the letter. Rinse the surface thoroughly and allow it to dry before refinishing.
DIY CLEANER
Here’s a deck cleaner you can make yourself. Recommended by the U.S. Department of Agriculture Forest Products Laboratory, it’s good for mildew and dirt.
• 1 qt. sodium hypochlorite solution (household bleach)
• ⅓ cup powdered laundry detergent
• 3 qts. warm water
In a 5-gal. plastic bucket, add the bleach and detergent to the water, then brush the cleaner onto the deck. Rinse thoroughly before applying a finish.
Caution: Do not use a detergent that contains ammonia. Ammonia and bleach react to form a poisonous gas.
Trim the replacement boards with a circular saw. Using adjacent boards as a cutting guide is faster and more accurate than measuring.
Step 3: Applying the Stain
Once all of the repairs have been made and the deck is clean, it’s time to apply a protective finish. Clear finishes and transparent stains are fine for new wood, but for older decks, Starling recommends using a semitransparent stain.
“The grain still shows through, but the pigment gives the old wood a clean, uniform color and helps the new wood blend in,” he says. The pigment also provides extra protection from the damaging effects of the sun and will last longer than clear finishes. Unlike paint, stain is absorbed by the wood and does not form a film on its surface, so it will not peel or chip.
Starling uses a sprayer and 2-in. brush to apply the stain. “Spraying is fast, and puts more stain on the wood than rolling or brushing,” Starling says. Most painters and homeowners are better off spraying on a generous coat of stain and then following up with a roller or brush to spread out puddles and work the finish into the wood. Starling, however, uses a modified technique. “Rollers push the stain off the wood and down the cracks,” he says. “I don’t get paid to paint dirt beneath the deck.” Starling sprays on a light coat, most of which is quickly absorbed into the wood. He uses the brush to remove puddles. “If the stain’s too thick, it dries blotchy,” he explains. Starling recycles the excess stain for use on exposed end grain.
Starling recommends starting at an inside corner and working out, applying the stain parallel to the deck boards. To avoid staining the nearby brick, he uses a small piece of cardboard as a spray shield; the brush provides even more control around deck railings and posts.
This 700-sq.-ft. deck required about 5 gal. of stain — almost twice as much as the estimates indicated on the can. Explains Starling, “Old wood can get thirsty. On some decks, I’ll need to apply two or three coats of stain in order to get a uniform finish.”
Subsequent coats should be applied while the first coat is still wet or they will not be absorbed into the wood. Stain won’t peel, but it can wear away, especially in high-traffic areas. Starling recommends applying a fresh coat every other year. A clear water repellent can be applied between stainings for extra protection.
Mesh filters (about $1 each) catch any particles that could wind up clogging the nozzle on the washer.
Step 4: Redoing a Railing
Because the original railing on their deck was in such bad shape, the Johnsons decided to replace it with a maintenance-free railing system. They chose Fiberon, a vinyl-coated wood-plastic composite. It’s available in premade panels or as kits. The Johnsons liked the contrast the white railing offered.
Tip: After cutting the end post flush with the deck using a reciprocating saw, remove the old railing in sections.
For an existing deck or concrete slab, Fiberon makes a surface-mount bracket, as shown below. For new decks, the manufacturer recommends installing the posts before the decking and using metal brackets that attach to the joists. To conceal any minor gaps where the balusters meet the bottom rail, Graf recommends using a mildew-resistant acrylic caulk.